Make Your Own Spectroscope | Spectroscopy Science Fair Project
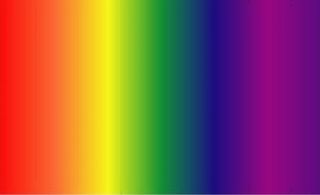
Most of the light that streams to our eyes appears white or yellowish, but light, part of the electromagnetic spectrum, actually contains several wavelengths, which the human eye sees as different colors.
Violet has the shortest wavelength that people can see, while red has the longest. At both ends of the visible spectrum, there are wavelengths that people cannot see, such as ultraviolet and infrared radiation.
How a spectroscope works
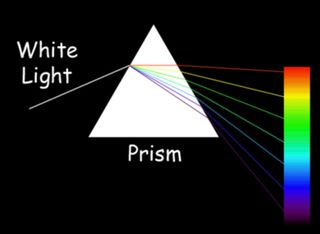
A spectroscope or spectrometer splits light into the wavelengths that make it up. Early spectroscopes used prisms that split the light by refraction — bending the light waves as they passed through the glass. A good example of refraction is a rainbow, in which sunlight passes through raindrops and is split into its different colors.
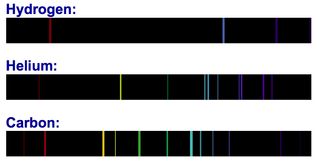
Modern spectroscopes often replace the prism with narrow slits called diffraction grating. The slits spread the light into different wavelengths by different amounts, which makes it possible to measure the wavelengths.
Substances that emit light produce an emission spectrum. Very hot metals, for example, emit light in all wavelengths and appear "white-hot." On the other hand, gases, when heated, produce light only at certain wavelengths, depending on the elements that are present. Also, each element absorbs light at specific wavelengths, called an absorption spectrum. Absorption spectra can be used to identify elements.
Chemists discovered some elements — cesium (atomic number 55) and rubidium (atomic number 37), for example — by using a spectroscope. Knowing the absorption spectra of elements, astronomers use spectroscopes to determine the chemical composition of stars and other distant objects.
Spectroscopes need not be limited to professional scientists. Building your own spectroscope using everyday items takes just under an hour.
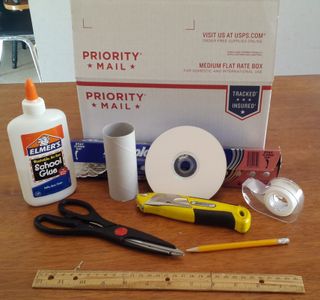
Materials needed
- A cardboard box: The box needs to be large enough to contain a CD or DVD. I used a medium priority shipping box, but small shipping boxes, shoe boxes or cereal boxes will work just as well.
- A DVD or CD: You won't be getting it back, so make sure it's one you don't mind losing.
- One or two business cards/3x5 cards: Business cards are thicker than standard index cards, so I felt they would let less light through. Some websites suggest using two single-edged razor blades, which would be thicker and certainly be straight, but paper cards are more child-friendly.
- A cardboard tube: A toilet paper tube or part of a paper towel or gift wrap tube works fine; larger tubes would, of course, need to be cut to a more manageable size.
- Aluminum tape or aluminum foil and glue: Aluminum tape can be found in most hardware stores, but standard foil from your kitchen and glue work effectively.
- Scissors or X-acto knife
- Cellophane tape
- Pen/pencil/marker
- Ruler
Overview
Light will enter your spectroscope through a small slit (the diffraction grating), reflect off the CD, and be seen through the viewing tube. The CD will help to ensure that the three elements line up correctly.
Procedure
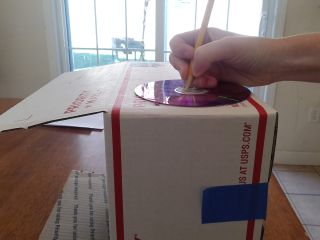
Step 1: Begin by making a hole for the viewing tube. Set the CD on top of the box, about a half an inch from the left edge on the side you intend to place the tube. Use a pen to trace the circle in the middle of the CD.
Step 2: Center the tube over the circle and trace it. Move the tube over about half an inch and trace another circle. The two overlapping circles create an oval.
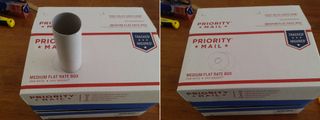
Step 3: Use scissors or an X-acto knife to cut the oval out of the box.
Step 4: Make the viewing slit. Turn the box to the right so that the viewing oval is on its side. Place the CD on the left-hand side of the box and draw another small circle to mark the location.
Step 5: Cut a small rectangle about half an inch wide and 2 inches high, with its base set on the circle created by the CD.
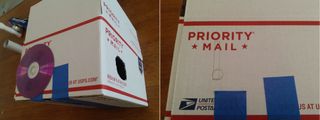
Step 6: Set the edges of two business cards parallel to each other over the rectangle, leaving a small gap between them. Make sure the gap is even, and not wider at the top or bottom.
If you decide to use razor blades, have the sharp edges create the slit between the two. Again, make sure the slit is even, and not larger at one end or the other.
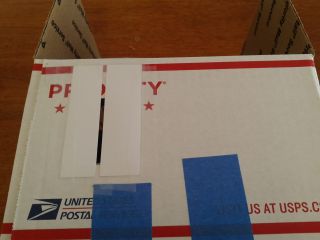
Step 7: Stand the box up. Tape the CD to the wall opposite the viewing slit, with the printed side against the wall and the rainbow side pointed toward the slit. Make sure that the edge of the CD is the same distance from the box side as the slit.
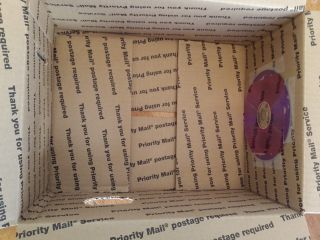
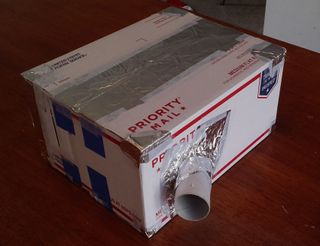
Step 8: Seal up the box using the aluminum tape or aluminum foil. Cover any region where light might get in. Leave the section surrounding the viewing oval open.
Step 9: Insert the paper tube into the oval, with the interior end angled toward the CD. Make sure that your angle is correct by aiming the slit toward a source of light so that the full spectrum is visible. Tape the tube in place and use the aluminum tape or foil to seal up the edges.
Using your spectroscope
A good science fair project using your spectroscope is testing the hypothesis that different gases produce different spectra of light.
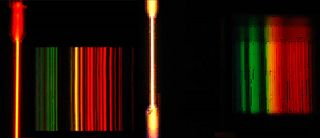
Aim your spectroscope at various light sources. Look for specific colors and notice the spacing between the colored lines.
An incandescent light bulb produces a continuous spectrum because it is a heated solid – a tungsten filament. A fluorescent bulb produces distinct colored lines because it contains mercury vapor.
Some other light sources to examine are a candle flame, a flashlight, yellow street lights, blue street lights, the flame from a Bunsen burner, a camping lantern and neon signs.
You can also examine sunlight, though you should NEVER LOOK DIRECTLY AT THE SUN THROUGH YOUR SPECTROSCOPE. Instead, aim your instrument at the light bouncing off of a white wall.
More Science Fair Projects
- How to Choose a Science Fair Project Topic
- Middle School Science Fair Projects
- High School Science Fair Projects
- Weather Experiments / Science Fair Projects
Further resources:
Sign up for the Live Science daily newsletter now
Get the world’s most fascinating discoveries delivered straight to your inbox.
